What Does Deck Builder Milpitas Mean?
Wiki Article
Pergola Intallation Milpitas Can Be Fun For Anyone
Table of ContentsThe Main Principles Of Pergola Intallation Milpitas Excitement About Milpitas Fence ContractorAll about Milpitas Fence ContractorWood Fence Installation Milpitas for BeginnersDeck Builder Milpitas - Truths

away from your home as well as adjust the gap dimensions to ensure the last board is a regular size. milpitas fence contractor. Screws or Nails for Deck: Predrill screws and also candid nailheads to avoid splitting Predrill Drill pilot openings for screws at board ends so the wood doesn't divided later. Start the openings concerning 1/2 in.
Even nails can cause splitting, particularly near completions of boards. Avoid this trouble by predrilling a hole the size of the nail shank. One more technique is to blunt the idea of the nail with your hammer before battering it in. "Splitless" ring-shank nails work well yet can bend as well as damage, especially near knots.
Screw down both ends of your straightedge after marking the decking. Determine the range from the line to the straightedge in the facility to make sure it's the very same as the end dimensions. If needed, flex the guide board till the dimension is the same and screw down the center.
9 Simple Techniques For Milpitas Fence And Deck


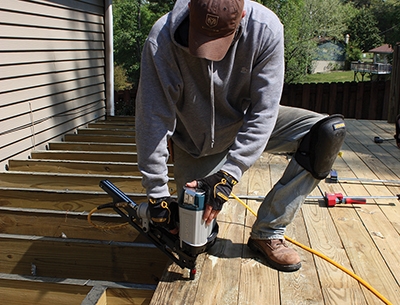
Make use of a 1/4-in. plywood pillow to protect the deck boards in instance you miss out on with a hammer. It allows you to focus on nailing without fretting about denting the deck boards. Next off, find out how to pick the most effective deck coating below. Needed Devices for this Task Have the required devices for this do it yourself job aligned prior to you startyou'll conserve time and disappointment.
When constructing my last deck, one of the major challenges I had was finding a method to lay my wood deck boards to make sure that it looked good yet still kept the integrity of the structure. Once I uncovered just how to lay deck boards correctly, my deck wound up looking good.
In this section, we'll review each step you require to require to mount timber deck boards. Pick Deck Boards Layout When selecting a deck board format, you are tightened to deck board sizes that can be bought at the shop. Criterion dealt with 5/4" wooded deck boards can come in sizes as much as 20', with sizes of 18', 16', 12', 10', and 8' likewise commonly available.
Aesthetically it will certainly also look much better; for that reason, you must provide the majority of your factor to consider to ensuring you can get deck boards that can run that area. If you have an actually large deck and also can not acquire deck boards that are as long as your deck, thinking about altering your layout to run the deck boards in the other direction.
Deck Builder Milpitas Things To Know Before You Buy
Choose the Kind of Decking Boards When it comes to selecting timber outdoor decking, you'll find that your regional large box stores bring 2 kinds: stress dealt with and also western red cedar. Both come in either 5/4" or 2" density. A deck constructed with 26 deck boards will feel a lot more strong; however the expense is substantially a lot more.No matter which type of lumber you select, your deck boards should be set up so that the grain mugs downward. Look at the cut end of a deck board.
Why? With time timber buckles as it dries, as well as it will certainly warp in the instructions of the grain. So if the grain encounters descending (meaning the open end of the cup deals with down on the end grain), then the timber will naturally warp that method. This is great since it suggests water will be able to run off easily and also not swimming pool on the surface area of the deck board.
While developing code dictates the use of nails for framing members in a deck, screws are extra proper for outdoor decking boards. When it concerns holding power, a screw is far pergola intallation milpitas more reliable in restricting lateral side to side activity than a nail. The threads of a screw provide it extra surface than a nail, which permits it to order the wood much better than a nail.
Top Guidelines Of Milpitas Fence And Deck
The thickness of a nail is why nails are mandated for usage in deck mounting members as opposed to deck screws. deck builder milpitas. Use screws when mounting your deck boards. Screws can likewise be faster to install, without the threat of damaging your deck board like you can if you made use of nails as well as a hammer.# 10 deck screws would certainly be somewhat larger, and also so on. A # 8 x 2" deck screw suffices for 5/4" deck boards. Bigger diameter screws would need pre-drilling with a larger drill bit, as the larger screws will crack your deck boards in a hurry without a pre-drilled opening.
If you get your deck boards from a new batch of store-delivered pressure-treated lumber, they may still be damp enough to flee without pre-drilling. If you aren't certain, you have actually got to pre-drill. An additional downside to utilizing regular deck screws is that it is very easy to plunge the screw as well deep right into the deck board.
Any kind of additionally will result in water standing in the screw opening, which will certainly speed up the degeneration of the board itself. Keep in mind that each deck board ought to have 2 screws at each joist.
Pergola Intallation Milpitas Can Be Fun For Everyone
The jig is an angled, handheld gadget that holds the screw at an angle, permit you to pierce into the side of your deck board and also into the joist below. The portable jig fastens to the size of any size of the deck board. It permits you to position a screw at each end of the jig and also fasten both sides of the board.Report this wiki page